
Gravity Forms becomes much more useful when it sends form data to the tools you already use. That is the big win. A form should not just sit there collecting names. It should trigger emails, payments, tasks, alerts, files, and follow-ups.
TLDR: Gravity Forms integrations connect your WordPress forms to apps like Mailchimp, HubSpot, Slack, Stripe, Zapier, Google Sheets, and Trello. A small service business can save 5 to 10 hours a week by sending lead forms straight to a CRM and alerting the sales team in Slack. For example, a gym could collect trial class requests, add each person to Mailchimp, create a HubSpot deal, and send a text reminder before class. Less copying. Fewer missed leads. Happier staff.
Why Gravity Forms Integrations Matter
Gravity Forms is a powerful WordPress form builder. On its own, it can collect contact details, orders, surveys, bookings, applications, and support requests.
But the real magic starts after someone clicks Submit.
That click can start a chain reaction. It can add a person to your email list. It can charge a card. It can create a support ticket. It can notify your team. It can save a file in cloud storage.
That is the point. Forms should do work for you.
Without integrations, someone usually has to copy data by hand. That gets old fast. Honestly, it feels like punishment when one lead form turns into five browser tabs and three copy paste jobs.

Popular Gravity Forms Integrations
Gravity Forms connects with many tools through official add-ons, third-party plugins, webhooks, and automation platforms. Here are the big ones worth knowing.
1. Email Marketing Tools
Email tools are often the first integration people set up.
- Mailchimp: Add subscribers, apply tags, and start welcome emails.
- ActiveCampaign: Add contacts, trigger automations, and score leads.
- Constant Contact: Send form leads into email lists.
- Campaign Monitor: Grow newsletter lists from form submissions.
Use this for lead magnets, event signups, discount codes, and newsletters.
2. CRM Tools
A CRM helps you track leads and customers. Gravity Forms can feed leads into your sales system without extra typing.
- HubSpot: Create contacts and deals from form entries.
- Salesforce: Send leads to sales teams for follow-up.
- Zoho CRM: Add prospects and manage pipelines.
- Pipedrive: Turn quote requests into sales opportunities.
This is useful for agencies, consultants, schools, gyms, clinics, and real estate teams.
3. Payment Tools
Want to collect money through a form? Gravity Forms can handle that too.
- Stripe: Accept credit cards, subscriptions, and deposits.
- PayPal: Take simple payments and donations.
- Square: Accept payments for services and products.
You can sell tickets, collect application fees, take donations, or charge for online classes.
4. Team Chat and Alerts
Some form entries need quick action. A hot lead should not wait in an inbox for two days.
- Slack: Send form alerts to a channel.
- Microsoft Teams: Notify departments about new requests.
- Email notifications: Route alerts based on form answers.
For example, a “Request a Quote” form can send high-budget leads to a sales channel. Low-priority requests can go to email. Simple and clean.
5. Spreadsheets and Data Storage
Some teams live in spreadsheets. No shame. Spreadsheets are easy to scan and share.
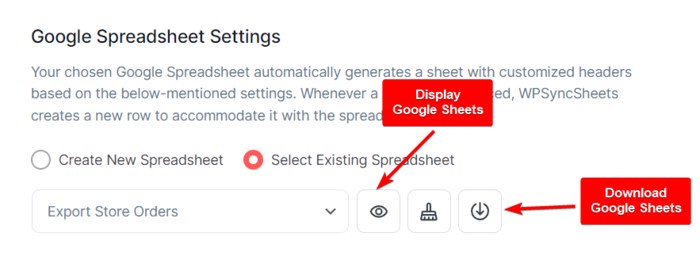
- Google Sheets: Add each entry as a new row.
- Excel Online: Store records for reports.
- Airtable: Build flexible databases from form entries.
Use this for event lists, inspection logs, contest entries, and survey results.
Automation Options for Gravity Forms
There are several ways to automate Gravity Forms. The best choice depends on your tools, budget, and how complex the job is.
Option 1: Official Gravity Forms Add-Ons
Official add-ons are usually the easiest place to start. They are built for Gravity Forms. Setup is often simple.
You connect the service. Pick the form. Match the fields. Save the feed.
Use official add-ons when you want fewer moving parts.
Option 2: Zapier
Zapier connects Gravity Forms to thousands of apps. It works with “if this, then that” logic.
Example:
- Trigger: New Gravity Forms submission.
- Action: Add contact to HubSpot.
- Action: Send Slack message.
- Action: Add row to Google Sheets.
The catch is that Zapier can get pricey as tasks grow. Expect to waste time fixing tiny field mapping problems too. One wrong dropdown can send the phone number into the company name box. Annoying? Very.
Option 3: Make
Make is another automation platform. It is visual. It is good for multi-step workflows. It can filter, format, split, and route data.
Use Make when your process has branches.
For example, if a form answer says “Support,” create a help desk ticket. If it says “Sales,” create a CRM deal. If it says “Billing,” email the finance team.
Option 4: Webhooks
Webhooks send form data to another app through a URL. They are great for custom systems.
This option is more technical. You may need a developer. But it gives you more control.
Use webhooks for custom CRMs, internal dashboards, mobile apps, or special reporting tools.
Option 5: WordPress-Based Automation
Some automation can happen inside WordPress.
- Create a new user after form submission.
- Publish user-submitted posts.
- Send data to WooCommerce workflows.
- Restrict content after payment.
- Assign roles based on form choices.
This is handy for membership sites, directories, job boards, and online communities.
Best Use Cases
Lead Capture
A visitor fills out a contact form. Gravity Forms sends the lead to HubSpot. It also alerts the sales team in Slack. Then Mailchimp sends a welcome email.
No one has to touch the data first.
Event Registration
A guest signs up for a workshop. The form collects payment through Stripe. It adds the person to Google Sheets. It sends a confirmation email. It can even tag them in an email tool for reminders.
Donations
A nonprofit collects donations with PayPal or Stripe. Donors get receipts. Staff get alerts. Donor details go into the CRM.
This keeps fundraising records tidy.
Support Requests
A customer fills out a support form. Gravity Forms sends the issue to a help desk. Urgent tickets go to Slack. Feature requests go to a spreadsheet.
No more lost emails.
Job Applications
An applicant uploads a resume. Gravity Forms stores the file in Dropbox or Google Drive. HR gets an alert. The entry goes into Airtable for review.

Tips for Cleaner Integrations
- Name your fields clearly. “Work Email” is better than “Email 2.”
- Use conditional logic. Show only the fields people need.
- Test every path. Submit fake entries before going live.
- Use hidden fields. Track source, campaign, or landing page.
- Keep notifications focused. Do not alert five people for every form.
- Check failed feeds. Integrations can break when passwords or API keys change.
Common Mistakes to Avoid
Sending every form entry to every tool is messy. Keep data where it belongs.
Forgetting consent is another big one. If you add people to a mailing list, show a clear opt-in checkbox.
Skipping spam protection can ruin your automation. Add reCAPTCHA, honeypot protection, or other anti-spam settings.
Not tracking source data makes reports weaker. Add hidden fields for UTM tags when running ads or campaigns.
Which Setup Should You Pick?
If you are new, start small.
- Connect Gravity Forms to your email tool.
- Add Slack or email alerts for key forms.
- Send leads to a CRM.
- Add payments if needed.
- Use Zapier, Make, or webhooks for advanced workflows.
A simple setup can still save hours. A smart contact form might collect the lead, tag the source, notify sales, and start a follow-up email within seconds.
That is the real value of Gravity Forms integrations. They turn basic forms into tiny robots. Friendly robots, too. They collect data, move it, sort it, and remind humans what to do next.
Start with one annoying manual task. Automate that first. Then move to the next one.